A simple garden hose test is not enough to guarantee your expensive new pergola is truly waterproof.
- Leaks often appear only under specific stress conditions, like thermal expansion from sun exposure or high-volume rainfall.
- A professional-grade inspection involves validating drainage capacity, seal integrity under pressure, and correct structural slope *before* final payment.
Recommendation: Use this inspector’s protocol to systematically identify hidden flaws, hold your contractor accountable, and protect your long-term investment.
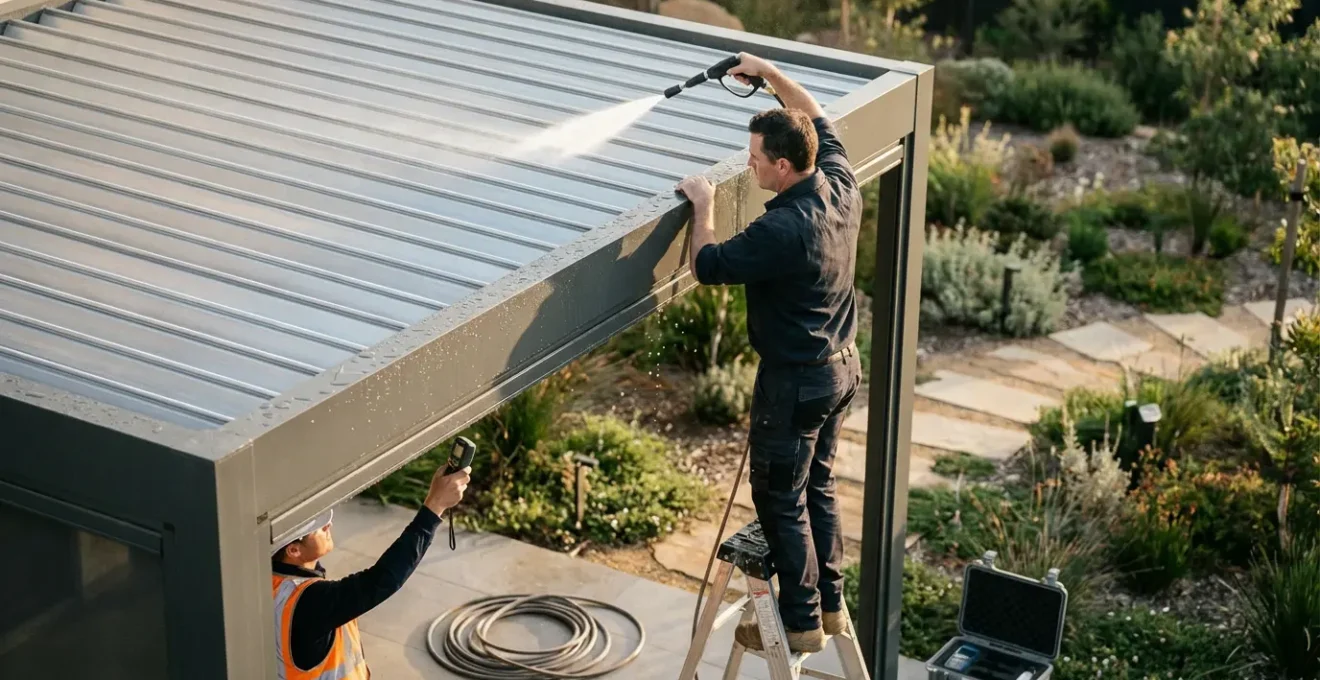
The vision is clear: a beautiful, dry outdoor living space protected by a new pergola. The reality, however, can quickly become a frustrating series of drips, damp furniture, and disputes with your installer. Many homeowners are told to simply “spray it with a hose” to check for leaks. As a quality inspector, I can tell you this is fundamentally inadequate. A true watertight system must perform under real-world stress, not just a gentle shower on a cool morning.
The most insidious leaks are those that don’t appear during a cursory check. They are triggered by specific environmental factors that a basic test will miss. The most common cause of failure is not a glaring hole, but a series of minor system inadequacies that only reveal themselves under pressure. This can be due to thermal expansion on a hot day, undersized gutters during a downpour, or improperly compressed seals that fail under wind-driven rain. Paying the final invoice without a proper validation protocol is a significant financial risk.
But what if the key wasn’t a simple test, but a structured inspection protocol? This guide moves beyond the amateur hose-down. It provides a series of rigorous, professional-grade tests designed to simulate the very conditions that cause most pergola systems to fail. By following these steps, you can confidently validate the quality of your installation, identify potential failure points before they become costly problems, and ensure the product you paid for is the product you received.
This article breaks down the professional validation process into clear, actionable tests. We will cover every critical component, from the roof’s slope and its seals to the hidden drainage systems inside the posts, giving you the knowledge to sign off on your project with complete peace of mind.
Summary: Your Complete Pergola Watertightness Inspection Guide
- Why a “Small Drip” Can Ruin Your Outdoor Rugs in One Season?
- How to Hide Downspouts inside Posts for a Clean Aesthetic?
- EPDM Gaskets vs Silicone Sealant: Which Lasts Longer in UV Light?
- The Flat Roof Myth: Why Your “Flat” Pergola Needs a 2% Slope?
- When to Replace Weather Stripping: The 3 Signs Your Seals Are Failing?
- The Drainage Design Flaw That Creates Puddles on Your Flat Roof
- How to Install Linear Drains for a Level Threshold in 4 Steps?
- How to Control the Greenhouse Effect in a South-Facing Sunroom?
Why a “Small Drip” Can Ruin Your Outdoor Rugs in One Season?
A “small drip” is the most deceptive flaw in a new pergola. It seems insignificant during a brief inspection, but its cumulative effect is destructive. A single drip per second adds up to over 5 gallons of water in a 24-hour period. That’s over 1,800 gallons of water concentrated on one spot over a year, guaranteeing the ruin of outdoor rugs, wood decking, and furniture. The financial stakes are high, with water damage repairs often costing between $30 to $60 per square foot for repairs.
The primary reason these small drips are missed is that they are often intermittent. They don’t happen all the time. One of the biggest culprits that a standard water test misses is thermal expansion. Metal pergola components, especially dark-colored aluminum, expand significantly when heated by direct sunlight. This movement can open up tiny gaps in seals and joints that are completely invisible and watertight when the structure is cool.
Case Study: The Afternoon Leak
A homeowner discovered that what appeared to be a ‘minor drip’ was actually causing an estimated $500 in damage to their outdoor rugs annually. Professional testing revealed the cause: thermal expansion during hot afternoons was opening small gaps in the roof panel seals. These gaps were completely invisible during standard morning inspections when the structure was cool. The solution, and a critical lesson for any homeowner, was to perform the water test after the pergola had been exposed to at least three hours of direct, intense sunlight, which revealed leaks the contractor’s own morning test had missed.
Therefore, testing a pergola in the morning or on an overcast day is not a valid test of its year-round performance. The “small drip” you don’t see during the initial inspection is often the very one that appears on the hottest day of the year, precisely when you want to be using your outdoor space. This is why a thermal stress test, which we will cover later, is a non-negotiable part of a proper validation protocol.
How to Hide Downspouts inside Posts for a Clean Aesthetic?
Integrating downspouts within the support posts is a popular design choice for a sleek, modern aesthetic. However, this clean look introduces a significant hidden risk: internal leaks and blockages. If the internal drainage system is undersized, improperly connected, or becomes clogged, water will back up, overflow the integrated gutter, and can even become trapped inside the structural post. Trapped water can lead to corrosion or, in colder climates, freeze and physically crack the post from the inside out.
You cannot visually inspect these hidden systems, so you must functionally test them. The first validation is the “Overwhelm Capacity Test.” Many installers use undersized internal gutters that can’t handle a heavy downpour. According to one manufacturer’s stress tests, gutters less than 4 inches wide are prone to failure during moderate rainfall. To test this, rapidly pour 5 gallons of water directly into the gutter’s entry point. The water should flow freely and exit the base of the downspout in under 60 seconds. If drainage is slow, or if water backs up and overflows the gutter, the system has failed the test.
An even more advanced technique used by professionals is the acoustic leak detection method. This test helps identify residual water trapped inside a post even after the main flow has stopped, indicating a partial blockage or internal leak. It requires a simple mechanic’s stethoscope, available at any auto parts store.
- Step 1: After a water test, press the stethoscope firmly against the outside of the support post at various heights.
- Step 2: Listen carefully for any faint dripping or gurgling sounds inside. Silence indicates a clear, empty channel. Any sound suggests trapped water.
- Step 3: As a secondary check, run your hand along the post. A noticeable cold spot can also indicate water accumulation inside the structure.
EPDM Gaskets vs Silicone Sealant: Which Lasts Longer in UV Light?
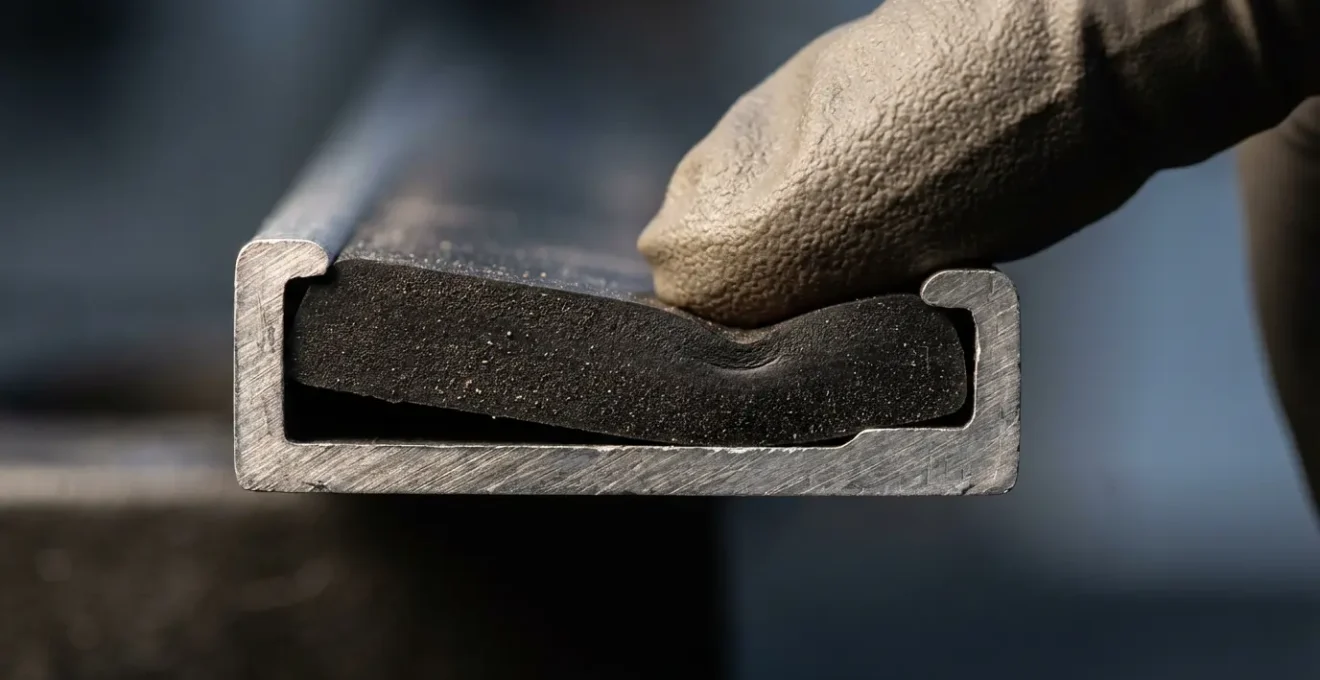
The long-term watertightness of your pergola roof depends almost entirely on the material used to seal the joints between panels and louvers. The two most common materials are silicone sealant and EPDM (ethylene propylene diene monomer) rubber gaskets. While both can provide a seal initially, their performance over time, especially under constant UV exposure, differs dramatically. As an inspector, I advise homeowners to be highly skeptical of systems that rely heavily on exposed silicone sealant.
Silicone is essentially a form of glue. Its effectiveness depends on a perfect, clean application and its chemical bond to the pergola’s surface. This bond degrades under UV light, becomes brittle, and will inevitably need to be scraped off and reapplied every 5-10 years. In contrast, EPDM is a highly stable synthetic rubber, similar to what is used for car door seals and commercial roofing membranes. It works by mechanical compression, not chemical adhesion. When properly installed in its channel, it creates a physical barrier that can maintain its flexibility and seal for over 20 years. The choice between these two materials is a primary indicator of a pergola’s quality and longevity.
The following table, based on industry data and material science, outlines the critical differences a homeowner must understand. As noted in a recent analysis of louvered pergola designs, relying on silicone is often a cost-cutting measure that compromises long-term durability.
| Feature | EPDM Gaskets | Silicone Sealant |
|---|---|---|
| UV Resistance | 20+ years | 5-10 years |
| Compression Set Risk | High if low quality | N/A |
| Adhesion Issues | Mechanical fit | Varies by coating |
| Maintenance | Replace when worn | Reapply regularly |
| Installation Check | Dollar bill test | 24-hour cure test |
When inspecting an EPDM gasket, it’s crucial to verify it has been installed correctly. A properly seated gasket will be under slight compression, ensuring a tight seal against both surfaces of the joint. It should not be twisted, stretched, or pinched within its channel, as this creates weak points that will eventually leak.
A simple but effective field test for gasket compression is the “Dollar Bill Test,” which we will discuss in the section on weather stripping. For now, understand that a system built with high-quality EPDM gaskets is fundamentally superior to one held together with silicone. Your pre-payment inspection must confirm which system was used and that it was installed to specification.
The Flat Roof Myth: Why Your “Flat” Pergola Needs a 2% Slope?
One of the most dangerous misconceptions in modern outdoor design is the idea of a “flat” waterproof roof. No such thing exists in competent construction. Any surface designed to shed water must have a slope, or “pitch.” Without it, water will “pond”—collecting in low spots, creating immense weight, and relentlessly working its way into the smallest seam or fastener hole. For pergolas, drainage engineering standards dictate that a 2% minimum slope is required to achieve the necessary water velocity to not only drain effectively but also to flush away small debris like dust and pollen that can clog systems over time.
A 2% slope is subtle and may not be obvious to the naked eye, which is why you must physically verify it before signing off. A 2% slope equates to roughly a 1/4-inch drop for every 12 inches of run. This slight angle is the difference between a functional roof and a future failure. Sagging beams or improper installation can easily create sections with a negative slope, where water actually flows *away* from the designated gutters, creating permanent puddles.
You do not need complex tools to verify this critical specification. A standard 4-foot carpenter’s level is all that is required to perform this essential pre-payment check. This test should be performed in several locations across the roof to identify any sagging in the center.
Your Action Plan: The 4-Foot Level Test
- Place a 4-foot level flat on the pergola’s roof structure, aligned in the direction of drainage.
- Observe the bubble in the level; it should be slightly off-center, indicating a downward slope toward the drainage side.
- For precise 2% verification, place a 1-inch thick block of wood under the uphill end of the 4-foot level.
- If the bubble now sits perfectly in the center, you have confirmed a proper 2% slope (a 1-inch rise over 48 inches is approximately 2%).
- Repeat this test in multiple locations, especially in the middle of long spans where beams are most likely to sag.
If the bubble indicates a backward slope or if it centers without the 1-inch block, the installation is incorrect and does not meet minimum standards for water management. This is a legitimate defect that the contractor must rectify before final payment is made. Do not accept excuses about it being “flat by design.”
When to Replace Weather Stripping: The 3 Signs Your Seals Are Failing?
For a new installation, the question isn’t “when to replace,” but “is the weather stripping installed correctly and made of quality material?” The seals, or weather stripping, on louvered systems are a primary line of defense. Any flaw in their installation or material quality is a guaranteed future leak. Your pre-payment inspection must be a rigorous audit of these components, looking for the tell-tale signs of poor workmanship or degraded materials.
There are three primary categories of failure to look for: poor compression, flawed installation, and material degradation. A failure in any of these areas compromises the entire system. Your inspection should be both tactile and visual, checking every accessible seal.
1. Compression Failure: The seal must be firmly compressed when the louvers are closed. The “Dollar Bill Test” is the classic method for checking this. Close the louvers on a dollar bill. If you can pull the bill out with zero resistance, the gasket is not compressing properly, and that spot will leak under wind-driven rain. There should be a noticeable drag on the bill.
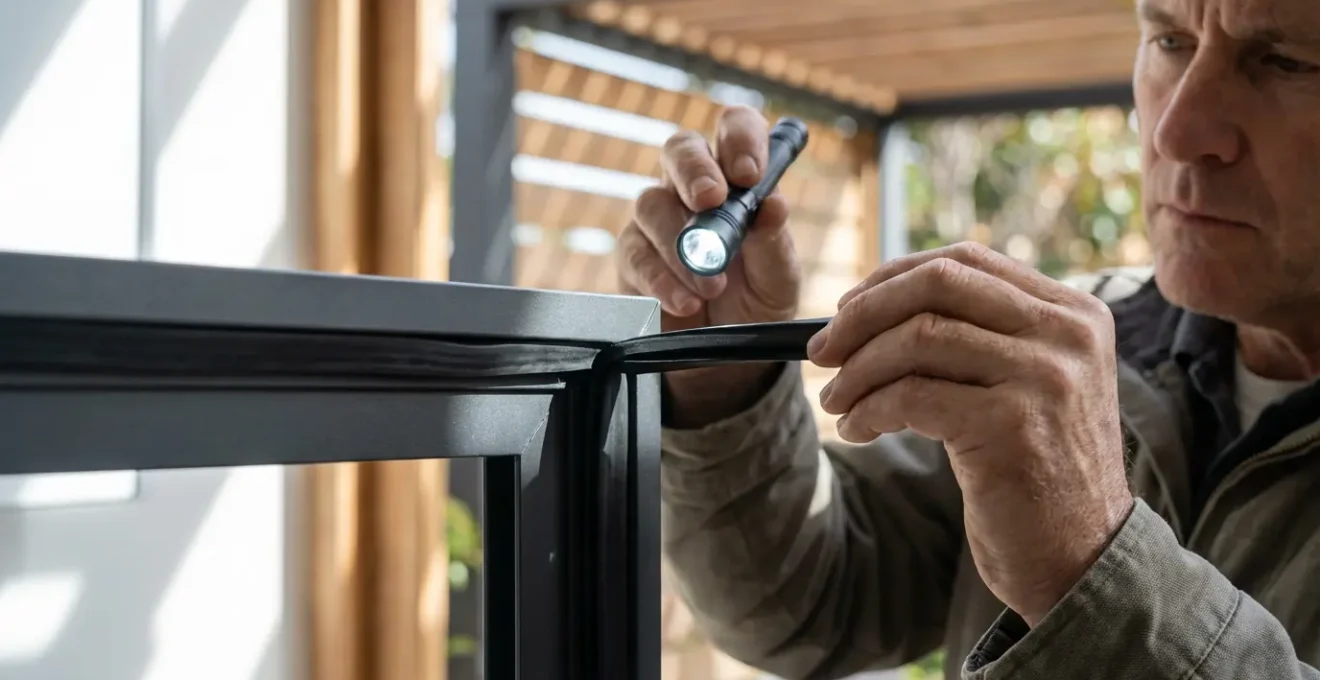
2. Installation Flaws: Visually inspect the entire length of the seals. Look for gaskets that are twisted or not properly seated in their channels. Pay extremely close attention to the corners. This is where installers often make mistakes, cutting the seal too short and leaving a small but critical gap. High-quality systems use factory-molded corners; lesser systems rely on the installer to make a perfect miter cut, which is a common failure point.
3. Material Degradation: Even on a new install, a contractor might use “old stock” weather stripping that has been sitting in a warehouse for years. Signs of aged EPDM include a chalky or dusty surface, noticeable stiffness (it should be soft and pliable), or a faded, grayish discoloration instead of a deep black. These seals have already lost their flexibility and will fail prematurely.
The Drainage Design Flaw That Creates Puddles on Your Flat Roof
Even with a perfect 2% slope, a pergola roof will fail if the drainage system itself is a bottleneck. The most common drainage design flaw is simply undersizing the components. The gutters and downspouts must be able to handle the volume of water collected by the entire roof area during a torrential downpour. An undersized system will be overwhelmed, causing water to back up and overflow, creating the very leaks the system was designed to prevent.
You can do a quick check on the specifications. According to drainage capacity calculations, a standard 2×3 inch downspout can handle runoff from approximately 600 square feet of roof area in moderate rainfall. If your pergola is large and has only one or two small downspouts, it is a major red flag that the system may be undersized for peak loads. High-quality systems often use larger 6-inch gutter systems to provide a wide margin of safety.
The “Overwhelm Capacity Test,” mentioned earlier for internal downspouts, is the definitive way to validate the entire system. This test simulates a cloudburst, a scenario that happens multiple times a year in many regions. A system that can’t pass this test is defectively designed.
Case Study: The Overwhelm Test Failure
A new pergola installation in a high-rainfall area failed its pre-payment inspection spectacularly during an “overwhelm test.” When the homeowner used two garden hoses to simulate heavy rain directed into the integrated gutters, the system backed up and overflowed within minutes. A subsequent investigation revealed the installer had used a standard 3-inch gutter system on a large roof area that clearly required a 6-inch system to handle the potential water volume. The installer was forced to retrofit the entire drainage system at significant cost—an expense and headache the homeowner avoided by testing *before* making the final payment.
Do not let an installer tell you their system is adequate without proving it. The Overwhelm Test is a reasonable and necessary validation. If the system overflows with one or two garden hoses running at full blast, it will certainly fail during a real storm.
How to Install Linear Drains for a Level Threshold in 4 Steps?
A linear drain installed in the patio surface at the base of the pergola is an elegant solution for managing water runoff and achieving a desirable level threshold between your home and your patio. However, from an inspector’s perspective, the installation isn’t complete until it’s been tested. Proper installation must be *verified* to ensure the linear drain integrates seamlessly with the pergola’s own drainage system and doesn’t create new water problems at the foundation of your house.
The verification involves two key tests: a System Integration Test and a Debris Clog Test. The first ensures water goes where it’s supposed to, and the second ensures the system will keep working in a real-world environment with leaves, pine needles, and other debris.
For the System Integration Test, use hoses to direct all the water from the pergola’s downspouts directly toward and into the linear drain. The goal is to simulate maximum rainfall. Watch carefully to ensure that no water pools near your home’s threshold and that there is no backflow away from the drain. The water should enter the drain and disappear without issue.
The Debris Clog Test is equally critical. A drain that works perfectly with clean water but clogs at the first sign of debris is a failed installation. A homeowner’s pre-payment test once revealed that a newly installed linear drain clogged instantly when tested with a handful of pine needles. The installer had used a grate with slots too narrow for an outdoor environment and had also forgotten to include weep holes for frost protection. The test forced a no-cost correction that saved the homeowner from thousands in potential water and frost damage, as noted in a case study on pre-payment testing. To perform this test, simply pour a bucket of water mixed with a handful of common yard debris (leaves, twigs) into the drain. It should handle this without immediately clogging.
Key Takeaways
- Test Hot, Not Cold: The most critical test is a water test performed after the pergola has heated in direct sun for 3+ hours to reveal leaks caused by thermal expansion.
- Verify Drainage Capacity: Use an “Overwhelm Test” with multiple hoses to ensure gutters and downspouts can handle a torrential downpour without overflowing.
- Confirm the 2% Slope: Use a 4-foot level and a 1-inch block to physically verify the roof has the minimum 2% slope required for proper drainage.
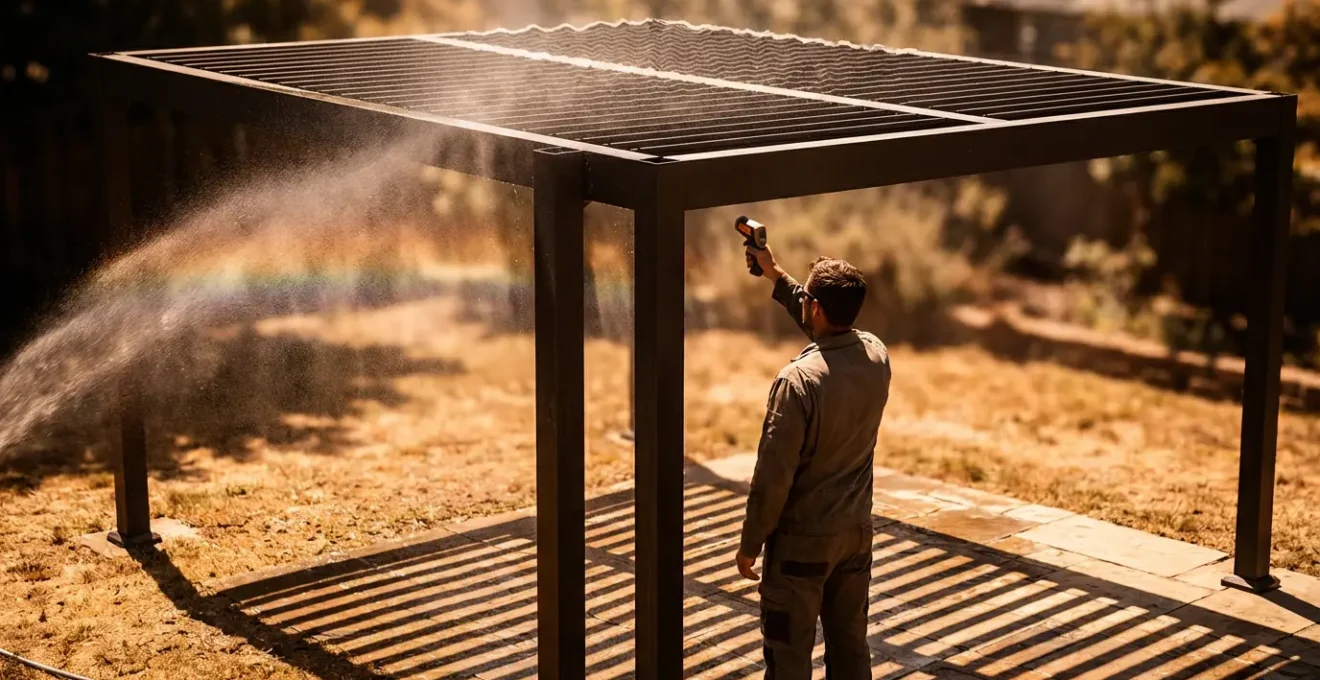
How to Control the Greenhouse Effect in a South-Facing Sunroom?
While the title mentions a sunroom, the principle is directly applicable to any south-facing pergola, which is subjected to the most intense solar radiation and heat. This heat, often called the greenhouse effect, is not just a comfort issue; it’s a primary driver of waterproofing failures. The final and most important validation you must perform is the Thermal Stress Water Test. This procedure combines the environmental factor of heat with a water test to simulate the most challenging real-world conditions.
As we’ve established, materials expand when heated. This movement is most pronounced on a south-facing structure in the mid-afternoon. Seals compress, joints shift, and tiny gaps can open up. A water test performed under these peak thermal load conditions is the single most effective way to uncover the subtle, intermittent leaks that cause the most long-term damage. A system that is watertight when hot is a system you can trust.
This test should be the final step in your inspection protocol before releasing the last payment. It synthesizes all the other elements—seals, joints, and drainage—and tests them as a complete system under maximum stress.
Follow this strict procedure:
- Allow the pergola to sit in direct, unobstructed sunlight for a minimum of three hours on a warm, sunny day. The structure should be noticeably hot to the touch.
- While the structure is still hot, begin the water test. Systematically spray all seams, joints, and the entire roof surface for at least 15-20 minutes.
- Check any ventilation features (like operable louvers) in both their fully open and fully closed positions, spraying them from low angles to simulate wind-driven rain.
- During this process, carefully inspect the underside for any drips. It’s important to differentiate true leaks (which will be consistent drip points) from general condensation (which may appear as a fine, widespread mist on cool surfaces).
A pass on this test is the highest level of assurance you can get. If the pergola remains perfectly dry while hot and under a deluge, you have successfully verified a quality installation.
Your final inspection is not an adversarial process; it is your right as a consumer to verify you have received the quality, all-weather product you paid for. By arming yourself with this professional-grade validation protocol, you are not just looking for problems—you are confirming quality. Take this checklist to your final walk-through with the contractor and methodically perform these tests. This diligence is the best and only way to protect your investment and ensure years of dry, worry-free enjoyment of your new outdoor space.