In summary:
- Shift from a 2D floor plan mindset to 3D “volumetric thinking” to identify hidden storage potential.
- Utilize vertical space from floor to ceiling to dramatically increase storage without losing a single inch of floor area.
- Transform awkward voids, like the space under stairs, into high-functioning, integrated storage systems.
- Choose built-in storage solutions over freestanding units to significantly increase your home’s resale value.
- Balance high-density storage with strategic design to avoid visual clutter and a claustrophobic feel.
For apartment dwellers, the quest for more space is a constant battle. Every square meter is precious, and the sight of an empty, unused corner can feel like a missed opportunity. The common advice is to fill these gaps with a corner shelf or a bulky cabinet, but this often adds more visual clutter than it solves. These solutions treat the symptom—a lack of storage—but ignore the root cause: a failure to see the true volume of your home.
The frustration is real. Many resort to external solutions, a trend confirmed by industry data showing how much space is rented off-site. But what if the answer isn’t outside your walls, but hidden within them? The key to unlocking that coveted extra 5m² isn’t about buying more furniture; it’s about adopting the mindset of a small-space architect. It requires a shift towards volumetric thinking—seeing your home not as a flat floor plan, but as a three-dimensional cube of potential.
Instead of just filling corners, we need to re-engineer the voids. This means going vertical, converting awkward niches into bespoke systems, and making strategic choices that enhance both utility and perceived space. This guide will move beyond generic tips to provide an architectural framework for genuine spatial reclamation. We will explore how to build upwards, transform the forgotten space under your stairs, and make smart investments that add real value to your home.
By following these principles, you can create integrated storage that feels like it was always part of your home’s design. This article provides a structured approach to identifying and converting these dead zones into high-utility assets. Discover the strategies to not only store more but to live better in the space you already have.
Summary: An Architect’s Guide to High-Utility Storage
- Why Going Floor-to-Ceiling Doubles Your Utility Without Losing Floor Space?
- How to Convert the Void Under Stairs into a Pull-Out Pantry?
- Built-in vs Freestanding Wardrobes: Which Adds More Resale Value per m²?
- The “Tetris” Mistake That Makes Your High-Utility Room Feel Claustrophobic
- When to Swap Seasonal Items to Reclaim 30% of Your Closet Space?
- How to Design a Home Office That Easily Converts to a Guest Bedroom?
- Why a Lean-To Is 30% Cheaper to Build Than a Gable Conservatory?
- How to Design Bespoke Shelving That Accommodates Large Art Books and Media?
Why Going Floor-to-Ceiling Doubles Your Utility Without Losing Floor Space?
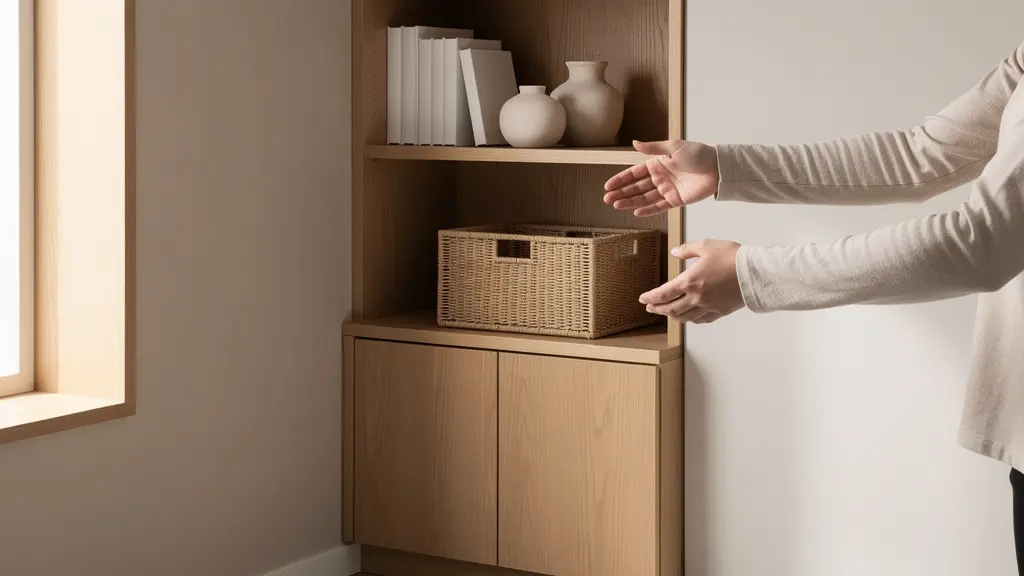
The most underutilized dimension in any apartment is height. We tend to think in terms of floor area, but the volume of space between the top of our furniture and the ceiling is a vast, untapped frontier for storage. Going floor-to-ceiling with shelving or cabinetry is the single most effective strategy for increasing your utility density. It allows you to store twice as much—or more—on the exact same footprint, effectively doubling its value without sacrificing an inch of livable area.
This vertical approach does more than just add storage; it enhances the sense of space. By drawing the eye upward, full-height units can make a room feel taller and more grand. The problem is that many are hesitant to build upwards, often because they are paying for space elsewhere. In fact, recent industry data reveals that Americans now have 6.32 square feet per person dedicated to off-site self-storage—space that could often be reclaimed at home with smarter vertical design. Building tall is an investment in your own property, not a recurring rental fee.
Of course, installing a full-height system requires more than just stacking shelves. It’s a structural consideration. You must ensure the wall can handle the load, especially for heavy items like books or kitchenware. This involves identifying wall studs and using appropriate anchoring hardware to distribute the weight safely. It’s a small amount of due diligence for a massive payoff in reclaimed space.
Your Action Plan: Calculate Your Wall’s Load-Bearing Capacity
- Locate Studs: Use a stud finder to identify the vertical framing supports within your wall. These are your strongest mounting points.
- Assess the Wall Type: Determine if the wall is a structural load-bearing wall, which typically runs perpendicular to the floor joists above.
- Calculate Maximum Weight: As a general rule, standard drywall on studs can support 15-20 lbs per linear foot. Plan your storage accordingly.
- Choose Appropriate Anchors: Use toggle bolts for hollow drywall sections and robust concrete or masonry anchors for solid walls.
- Distribute Weight Evenly: For heavy systems, ensure the load is spread across multiple studs rather than concentrated on a single point.
How to Convert the Void Under Stairs into a Pull-Out Pantry?
The triangular void under a staircase is the classic example of “dead space.” It’s awkward, dark, and often relegated to a messy cupboard of forgotten items. However, with an architectural mindset, this area can be transformed into one of the most efficient and impressive storage features in a home. The key is to abandon the idea of a simple door and static shelves and instead embrace custom-designed, full-extension mechanics.
Imagine a series of graduated pull-out cabinets or drawers that perfectly match the diagonal slope of the stairs. Each unit can be designed for a specific purpose: deep drawers at the bottom for bulk items, shallower ones in the middle for cans and jars, and tall, narrow pull-outs for brooms or cleaning supplies. This turns a once-inaccessible void into a highly organized and fully accessible pantry or storage hub.
The success of such a system hinges on high-quality hardware. Heavy-duty, soft-close drawer glides are essential to ensure a smooth, effortless operation, even when the drawers are fully loaded. This is not a standard off-the-shelf solution; it’s a bespoke piece of cabinetry that becomes an integral part of your home’s architecture.
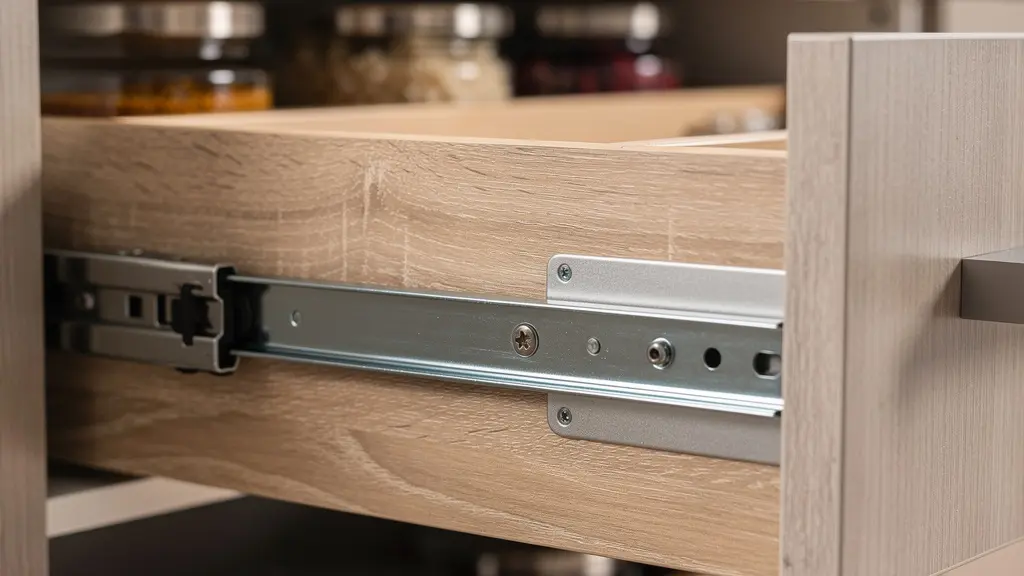
As the illustration shows, the magic lies in the engineering. The tiered design ensures that every single cubic inch of the void is put to work. While this is a more involved project, the return on investment in terms of both functionality and “wow factor” is immense. It’s a prime example of spatial reclamation, turning a structural negative into a clear positive.
Built-in vs Freestanding Wardrobes: Which Adds More Resale Value per m²?
When it comes to bedroom storage, the choice between a freestanding wardrobe and a built-in system is more than just an aesthetic one—it’s a financial decision. A freestanding unit is furniture; you can take it with you when you move, but it rarely fits a new space perfectly. It leaves awkward gaps at the sides and top, collecting dust and wasting precious volume. A built-in wardrobe, by contrast, is an architectural upgrade. It’s designed to become part of the room, maximizing every millimeter from wall to wall and floor to ceiling.
This integration has a direct impact on your property’s resale value. While freestanding furniture is seen as a personal item, built-in storage is perceived as a permanent asset and a luxury feature. Potential buyers see a seamless, organized space that solves a major problem for them before they even move in. As interior designer Rachel Blindauer notes in an interview with Family Handyman:
Storage upgrades make a visceral impression. I’ve seen storage become the tipping point between a walk-through and a written offer.
– Rachel Blindauer, Family Handyman interview
The initial cost of a built-in system is higher, but the long-term return on investment is undeniable. It not only provides superior space efficiency but also directly contributes to your home’s market appeal. Freestanding units offer flexibility, but they fail to deliver the same level of spatial optimization or financial return.
This table, based on an analysis of home storage solutions, breaks down the key differences and makes the financial case for integrated design.
| Feature | Built-in Wardrobes | Freestanding Units |
|---|---|---|
| Installation Cost | $2,000-$5,000 | $500-$2,000 |
| Space Efficiency | 100% wall-to-wall coverage | 85-90% (gaps on sides/top) |
| Resale Impact | Adds 2-3% home value | No permanent value add |
| Flexibility | Fixed configuration | Fully reconfigurable |
| Longevity | 20+ years typical | 10-15 years typical |
The “Tetris” Mistake That Makes Your High-Utility Room Feel Claustrophobic
You’ve maximized every corner and gone floor-to-ceiling with storage. Your room has incredible utility density, yet it feels smaller and more stressful than before. This is the “Tetris” mistake: achieving perfect functional efficiency at the cost of visual harmony. When a wall of storage is a monolithic, undifferentiated block, it creates an oppressive visual weight that can make even a large room feel claustrophobic.
The drive to store everything is understandable; industry statistics show that over 11.1% of US households rent a storage unit, proving the widespread need for more space. However, the solution isn’t just to cram everything in. A small-space architect knows that how a space *feels* is as important as how it *functions*. The goal is to design storage that feels light and integrated, not heavy and imposed.
To combat this, you must break the visual monotony. This involves creating a rhythm of open and closed spaces. Use a mix of materials, vary the depths of shelves, and intentionally leave some areas empty. This “negative space” is not wasted; it’s a crucial design element that allows the room to breathe. An asymmetrical layout is often more visually interesting and less imposing than a perfectly symmetrical grid.
Case Study: Il Cubotto’s Double-Height Solution
In the Il Cubotto apartment project, architect Caterina Pilar Palumbo faced the challenge of adding massive storage to a compact space. Instead of a solid wall of cabinets, she utilized the room’s double-height ceiling to create full-height shelving. By using a stepladder to access the upper levels, she kept the eyeline clear and open, demonstrating how extreme vertical storage can paradoxically make a space feel larger and more expansive.
The key is to apply the 60-30-10 rule often used in interior design: 60% of your storage wall should be closed cabinets, 30% should be open display shelving, and 10% can be an accent material or empty space. This creates a balanced composition that is both highly functional and aesthetically pleasing.
When to Swap Seasonal Items to Reclaim 30% of Your Closet Space?
Your closet is prime real estate, yet for half the year, a significant portion is occupied by out-of-season clothing. Bulky winter coats in July, or summer dresses in January—these items are essentially “dead space” in your daily life. Implementing a disciplined seasonal swap is one of the quickest ways to reclaim up to 30% of your most accessible storage space without building anything.
The strategy is simple: maintain an “active” wardrobe of current-season items and a “stored” wardrobe of off-season items. The key is defining the trigger for the swap. Rather than an arbitrary date on the calendar, the most effective trigger is a consistent change in temperature. When nighttime temperatures reliably dip below 60°F (15°C), it’s time to bring out the winter gear. Conversely, when they stay above that threshold, it’s time for summer clothes.
To maximize the space gained, proper storage techniques are crucial. Use vacuum-sealed bags for bulky items like parkas and comforters; they can reduce volume by up to 75%. Clearly labeled, under-bed storage containers are perfect for sweaters and boots. The goal is to make the stored items compact and easily accessible for the next swap.
To prevent this system from leading to accumulation, adopt the “one-in-one-out” rule. For every seasonal item you bring back into your closet, you must archive or donate an item you didn’t wear in the past season. This maintains a state of equilibrium and prevents the slow creep of closet clutter, ensuring your most valuable storage space remains efficient and organized year-round.
How to Design a Home Office That Easily Converts to a Guest Bedroom?
In a small apartment, a dedicated guest bedroom is a luxury few can afford. Likewise, a permanent home office can feel like a waste of space when not in use. The architectural solution is to design a single room that serves both functions flawlessly—a true dual-purpose space. The challenge is to avoid a compromise where it functions poorly as both. The key is not just multi-functional furniture, but a fully integrated convertible system.
The cornerstone of this design is the modern Murphy bed, or wall bed. Forget the clunky, spring-loaded contraptions of the past. Today’s systems are sophisticated, seamlessly integrated pieces of cabinetry. Many are designed with a permanent desk attached. When the bed is folded up into the wall, a full-sized desk is available. When you need the guest room, the desk mechanism pivots or slides away, allowing the bed to be lowered without having to clear off your workspace. Your monitor, keyboard, and papers stay put.
This creates a true transformation, not just a temporary setup. To complete the design, flank the wall bed with floor-to-ceiling built-in shelving and cabinets. This provides permanent storage for office supplies, files, and books, while also offering space for guests’ belongings. Integrated lighting is also crucial: task lighting for the desk and softer, ambient lighting for when the room is in bedroom mode.

As shown here, the system is designed as a single, cohesive architectural element. The result is a room that is 100% a home office by day and 100% a comfortable guest bedroom by night. There is no compromise, only a brilliant maximization of utility density that effectively gives you two rooms in the footprint of one.
Why a Lean-To Is 30% Cheaper to Build Than a Gable Conservatory?
While not a typical apartment solution, understanding cost efficiency in small additions like conservatories reveals a core architectural principle: simplicity saves money. For homeowners looking to add a small sunroom or conservatory, the design choice between a lean-to and a gable roof has a massive impact on the budget. A lean-to conservatory, which features a single-slope roof that “leans” against the main house wall, is consistently around 30% cheaper to build than a gable-fronted design with its traditional two-sided pitched roof.
The savings come from multiple factors rooted in structural simplicity. The foundation work for a lean-to is less complex, as it primarily supports three exterior walls instead of four. The single-slope roof requires standard, rectangular panes of glass, which are far cheaper to manufacture and install than the custom-cut triangular pieces needed for the peak of a gable roof. This simplification extends to the engineering, as calculating load distribution for a single slope is more straightforward and requires less structural reinforcement.
Furthermore, a lean-to is more energy-efficient. By sharing a long wall with the main house, it benefits from the home’s existing insulation and has less exposed surface area, resulting in significantly lower annual heat loss compared to a more exposed gable structure. Every element, from materials to labor to long-term running costs, is optimized for economy.
The following table provides a clear cost comparison, drawing from data on conservatory construction factors. It illustrates how structural complexity directly translates into higher project costs across every phase of the build.
| Cost Factor | Lean-To Design | Gable Design | Savings |
|---|---|---|---|
| Foundation Work | $2,000-3,000 | $4,000-6,000 | 50% |
| Glazing Materials | Standard rectangular panels | Custom triangular cuts | 35% |
| Structural Engineering | Single slope calculation | Complex load distribution | 40% |
| Annual Heat Loss | 15% (shared wall) | 25% (exposed surfaces) | 40% |
| Total Project Cost | $15,000-20,000 | $22,000-30,000 | 30%+ |
Key takeaways
- Think vertically: Floor-to-ceiling storage is the most efficient way to add utility without sacrificing floor space.
- Invest in integration: Built-in solutions add significantly more resale value and space efficiency than freestanding furniture.
- Design for visual balance: Mix open and closed storage, and use negative space to prevent high-density rooms from feeling claustrophobic.
How to Design Bespoke Shelving That Accommodates Large Art Books and Media?
Standard, off-the-shelf bookcases often fail when it comes to storing oversized items like large-format art books, vinyl records, or media equipment. They are typically too shallow, not strong enough, or have fixed shelf heights that waste vertical space. Designing bespoke shelving is the only way to create a storage solution that is perfectly tailored to your collection and becomes a beautiful display feature in its own right.
The first step is to measure your largest items. A typical art book can be 12-15 inches deep, so your shelves need a minimum depth of 16 inches to sit flush without overhang. This is significantly deeper than the standard 10-12 inches of most bookcases. This extra depth also provides a more substantial, architectural look.
Next is strength. A linear foot of books can weigh 20-50 pounds. For wide shelves (over 36 inches), reinforcement is non-negotiable to prevent sagging. This can be achieved by using thicker material (1.5-inch solid wood or high-quality plywood), adding a hardwood front edge or “nosing” to stiffen the shelf, or incorporating vertical dividers. For a minimalist look, concealed metal support brackets can be installed within the shelves themselves.
Finally, consider adjustability and integration. While fully adjustable shelves offer flexibility, a semi-custom approach often looks more intentional. Design a system with a mix of fixed shelf heights tailored to your specific media: a tall section for art books, a 13×13 inch grid for vinyl records, and standard-height shelves for paperbacks. Integrating lighting, such as LED strips along the front or back edge of the shelves, can transform the unit from simple storage into a dramatic gallery wall, highlighting your most prized possessions.
Frequently Asked Questions About Gaining Storage Space
When should I swap summer clothes for winter items?
The best time to transition is when nighttime temperatures consistently drop below 60°F (15°C). In most climates, this typically occurs from late September to early October.
How much space can vacuum-sealed bags actually save?
For bulky items like comforters and winter coats, vacuum-sealed bags are a game-changer. They can reduce the original volume by 50-75%, effectively tripling your storage capacity for those specific items.
What’s the one-in-one-out rule for seasonal swaps?
It’s a simple discipline to prevent accumulation. For every item you bring back into your active closet rotation from storage, you must remove one item you haven’t worn in the past season. This maintains a perfect equilibrium.
Start seeing your home not for the space it has, but for the potential it holds. Your next 5m² are already there, waiting to be unlocked. It’s time to reclaim them.