Correctly sizing HVAC for a glass extension is not about maximizing BTUs, but about minimizing the thermodynamic load first, then precisely matching a system to the remaining demand.
- A glass wall loses heat at triple the rate of an insulated stud wall, making load reduction the primary engineering goal.
- Oversizing an AC unit to compensate for solar gain leads to poor humidity control and decreased comfort, a common and costly mistake.
Recommendation: Prioritize investments in high-performance glazing, thermal framing, and dynamic shading before performing a Manual J load calculation for the right-sized system.
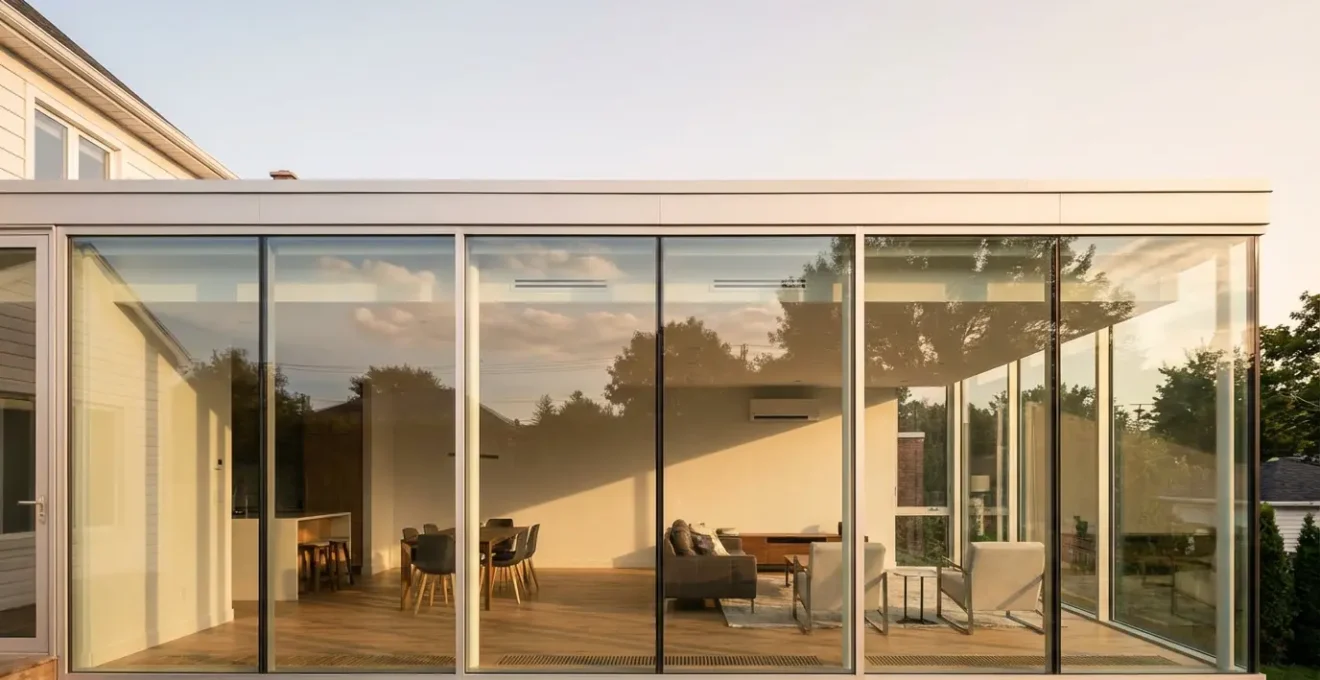
For homeowners planning a light-filled extension, the primary concern is often aesthetic. Yet, the physics of a highly glazed structure introduces a significant engineering challenge: maintaining year-round comfort without exorbitant energy costs. The common assumption is that one must simply install a larger, more powerful HVAC unit. This approach is not only inefficient but often counterproductive, leading to a host of comfort and maintenance issues. The conventional wisdom of focusing solely on the heating and cooling appliance is flawed.
The core of the problem lies in the thermal properties of glass itself. A glass extension is a thermal amplifier, rapidly gaining heat under solar radiation and losing it just as quickly when external temperatures drop. Tackling this requires a shift in perspective. Instead of asking “How big should my HVAC unit be?”, the correct initial question is “How can I reduce the thermal load of the structure itself?”. This involves a systematic analysis of glazing performance, framing materials, and, most critically, strategies for managing solar heat gain before it ever enters the space.
The true solution is a two-part engineering process. First, an aggressive reduction of the building’s thermodynamic load through superior materials and dynamic shading. Second, a precise “right-sizing” of the HVAC system based on the *reduced* load. This methodology ensures the system operates in long, efficient cycles, properly managing both temperature and humidity. This guide will deconstruct this process, providing the mathematical and strategic framework to calculate and implement an efficient HVAC solution for any highly glazed extension.
This article provides a structured, engineering-based approach to ensure your glass extension is a comfortable living space year-round. The following sections detail the critical calculations and strategic decisions required for a successful outcome.
Summary: A Technical Guide to HVAC Sizing for Glazed Additions
- Why Heating a Glass Extension Costs 3x More Than a Standard Room?
- How to Tap into Your Existing Ductwork Without Losing Pressure?
- Mini-Split vs PTAC: Which Is Quieter for a Home Office Extension?
- The AC Mistake That Dries Out Your Eyes and Wood Furniture
- How to Use Geofencing to Pre-Cool Your Extension Before You Arrive?
- How to Lower Your HVAC Load by 25% With Strategic Thermal Blinds?
- How to Sit Next to a Large Window in Winter Without Feeling a Draft?
- How to Justify the Cost of a Motorized Pergola Compared to a Fixed Roof?
Why Heating a Glass Extension Costs 3x More Than a Standard Room?
The increased heating cost of a glass extension is not an opinion; it is a direct result of fundamental thermodynamics. The primary metric for heat loss is the U-value, which measures the rate of heat transfer through a material. A lower U-value signifies better insulation. A standard insulated wall has a U-value around 0.3 W/m²K. In contrast, even high-performance glazing struggles to compete. For instance, recent data from UK glazing specialists shows that standard double-pane windows have U-values of 1.4 W/m²K, nearly five times higher than a solid wall. Even advanced triple-pane units at 0.8 W/m²K still lose heat more than twice as fast.
This differential has a direct and calculable financial impact. A single 2m x 2m window with a standard U-value can be responsible for significant annual heating costs compared to a more efficient alternative. When an entire room is constructed from this material, the cumulative effect is a massive increase in the thermodynamic load of the space. The furnace or heat pump must run longer and harder to compensate for this constant heat escape, directly translating to higher utility bills.
Furthermore, the glazing is only one part of the equation. The window or door frames themselves contribute significantly to the overall U-value of the assembly. The choice of frame material is a critical engineering decision, as it can either bolster or undermine the performance of the glass itself.
This table from building material analysts at BJH Windows demonstrates the stark performance differences between common frame materials. A standard aluminum frame performs poorly, acting as a thermal bridge that negates many benefits of good glazing.
| Frame Material | Typical U-Value | Performance Rating |
|---|---|---|
| uPVC | 1.2-1.4 W/m²K | Good |
| Thermally Broken Aluminum | 1.5-2.0 W/m²K | Moderate |
| Standard Aluminum | 3.0-4.0 W/m²K | Poor |
| Composite | 1.0-1.2 W/m²K | Excellent |
Therefore, the first step in any HVAC calculation is to quantify this heat loss based on the specified materials. Only by understanding this baseline energy deficit can you begin to design an effective and efficient heating strategy. Ignoring these figures leads directly to an undersized system that fails to keep the room warm or an oversized one that wastes energy.
How to Tap into Your Existing Ductwork Without Losing Pressure?
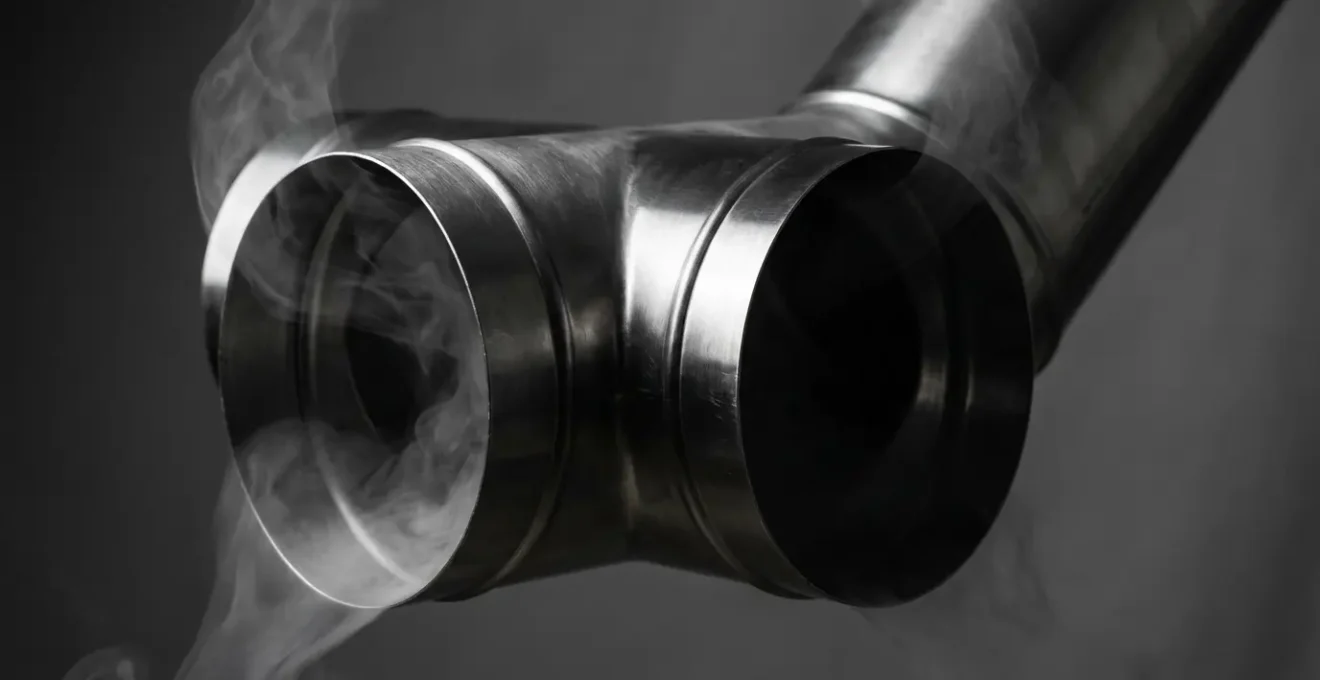
A common proposal to condition a new extension is to simply extend the existing HVAC ductwork. While appealing for its perceived low cost, this modification can have severe consequences for the entire system if not executed with engineering precision. The core issue is static pressure, the potential energy of the air within the duct system. Every turn, junction, and foot of ducting adds resistance, causing a pressure drop. Extending a duct run without proper calculation can “starve” the new extension of airflow and simultaneously reduce airflow to other rooms in the house.
An HVAC system’s blower is designed to move a specific volume of air (Cubic Feet per Minute or CFM) against a specific total static pressure. Adding a new, long run of ductwork increases this pressure, forcing the blower to work harder and deliver less air overall. This can lead to unbalanced temperatures throughout the home, increased energy consumption, and premature failure of the blower motor. The solution is not to simply cut a hole and attach a new vent; it is a systematic process of measurement and modification.
The following checklist outlines the professional methodology. Attempting to bypass these steps is a primary cause of poor performance in home additions. This is a task that requires specialized tools, such as a manometer to measure static pressure, and a deep understanding of fluid dynamics.
The diagram above illustrates the ideal geometry for a takeoff collar, designed to minimize turbulence and maintain pressure. Using smooth, curved transitions instead of abrupt 90-degree angles is critical for efficient airflow. Any modification must be treated as a redesign of a portion of the system, not a simple add-on.
Action Plan: Tapping Into Existing Ductwork Correctly
- Measure the existing duct dimensions and static pressure at the main plenum before any modifications using a manometer.
- Calculate the additional CFM requirements for the glass extension based on a proper load calculation (Manual J).
- Install a properly sized takeoff collar with an integrated damper at the main supply plenum, not on a downstream branch line.
- Use smooth, hard-pipe metal transitions and ductwork to minimize turbulence and static pressure loss, avoiding flexible ducting where possible.
- Perform a post-installation static pressure test and balance the entire system using dampers to ensure design airflow to all rooms.
If the existing system lacks the capacity to handle the additional load and static pressure, or if accessing the main plenum is impractical, a standalone system for the extension is the superior engineering choice. Forcing an undersized system to do more work is a recipe for failure.
Mini-Split vs PTAC: Which Is Quieter for a Home Office Extension?
When a dedicated HVAC system is the required solution, two common options for single-zone applications are ductless mini-splits and Packaged Terminal Air Conditioners (PTACs). While both can provide heating and cooling, their operational acoustics are vastly different, a critical factor for a space intended as a home office or quiet retreat. The clear winner for acoustic performance is the mini-split system.
The architectural difference is key. A PTAC is a self-contained unit installed through the wall, meaning the compressor, fans, and all mechanical components are housed in a single chassis within the living space. This design inevitably transmits noise and vibration directly into the room. In contrast, a mini-split system has a “split” design: the noisy compressor and condenser fan are located in an outdoor unit, connected by a small conduit to a quiet indoor air-handling unit. This separation is the primary reason for their superior acoustic performance. The difference is not trivial; it is orders of magnitude.
The quantitative data is unequivocal. According to industry metrics, noise level testing shows that modern mini-splits operate at an almost inaudible 19-40 decibels (dBA) on their indoor units. A PTAC unit, by comparison, typically runs at 45-60 dBA. This difference can be the deciding factor between a productive workspace and a source of constant distraction.
The following table provides context for these decibel ratings, making the choice for a noise-sensitive environment clear. A high-wall or floor-console mini-split operates at a sound level comparable to a whisper or a quiet library, making it ideal for a home office.
| System Type | Indoor Noise (dBA) | Comparable Sound | Suitable for Office? |
|---|---|---|---|
| High-wall Mini-split | 20-40 | Whisper to library | Excellent |
| Floor-console Mini-split | 19-38 | Quieter than whisper | Excellent |
| Standard PTAC | 45-60 | Normal conversation | Marginal |
| Ducted Mini-split | < 20 | Almost silent | Perfect |
While a PTAC may have a lower initial purchase price, the long-term cost in terms of occupant comfort and productivity in a home office setting often makes the mini-split a more valuable investment. For any application where noise is a primary concern, the engineering choice points definitively toward a split system.
The AC Mistake That Dries Out Your Eyes and Wood Furniture
The most common and counter-intuitive mistake in conditioning a glass extension is oversizing the air conditioner. Driven by the fear of intense summer heat, homeowners and unqualified installers often select a unit with a much higher BTU capacity than required. While this may cool the room down quickly, it sabotages one of the air conditioner’s most critical functions: dehumidification. This results in a room that feels “cold and clammy” and can lead to physical discomfort and damage to interior finishes.
An air conditioner removes humidity from the air by passing it over a cold evaporator coil, causing moisture to condense and drain away. This process requires the system to run for extended periods. An oversized unit, however, blasts the room with cold air and satisfies the thermostat’s temperature setting very quickly—often in less than 10 minutes. This is known as short-cycling. The system shuts down before it has had sufficient time to remove a significant amount of water vapor from the air. The result is high relative humidity, even at a cool temperature.
This high humidity environment is uncomfortable and unhealthy. It can cause occupants to experience dry, irritated eyes and mucous membranes as their bodies struggle to regulate moisture. Furthermore, it creates a damaging environment for wood furniture, flooring, and millwork, which can swell, warp, or become susceptible to mold growth. A correctly “right-sized” system is the only solution.
You may have an oversized AC unit if you notice the following symptoms:
- The unit cycles on and off in very short intervals, typically less than 10 minutes.
- The room feels damp or clammy despite the thermostat reading a low temperature.
- Condensation frequently forms on the inside of the large glass panes.
- A persistent musty or mildew-like smell develops in the room.
The solution is to perform a meticulous Manual J load calculation that accounts for the glass, solar gain, and infiltration, and then select a unit that precisely matches that load. Modern variable-speed inverter systems, often found in mini-splits, excel in these situations as they can modulate their output down to match lower loads, allowing for long, slow, and efficient run times that are perfect for dehumidification.
How to Use Geofencing to Pre-Cool Your Extension Before You Arrive?
Beyond hardware selection, modern HVAC efficiency is heavily reliant on intelligent control systems. For a glass extension with its high thermal volatility, geofencing is a powerful tool to optimize comfort and energy use. Geofencing uses your smartphone’s GPS location to create a virtual perimeter around your home. When you cross this boundary, it can automatically trigger pre-programmed actions, such as adjusting the thermostat in your extension.
The primary benefit for a glass room is pre-conditioning. Instead of running the AC all day to maintain a set temperature or coming home to an uncomfortably hot room, geofencing allows the system to kick on just before your arrival. This means the extension can be allowed to reach a higher temperature while unoccupied, saving significant energy. When the system detects you are, for example, 15 minutes away from home, it will activate the cooling to bring the room to your desired temperature precisely as you walk in the door.
Implementing this requires a smart thermostat compatible with geofencing features, such as those offered by Ecobee or Nest. The setup involves creating an automation or “scene” within the thermostat’s app that links your location to a specific HVAC action. For maximum effectiveness in a glass room, this automation should control not just the AC, but also any integrated motorized shades or blinds to block incoming solar radiation during the pre-cooling cycle.
A typical setup process involves these key steps:
- Install a smart thermostat (e.g., Ecobee, Google Nest) that has a robust geofencing feature and is properly wired to your extension’s HVAC system.
- In the app, define the geofencing radius around your home. A radius that equates to a 15-20 minute travel time is a good starting point.
- Create an “Approaching Home” or “Away” automation. The “Approaching” scene should set the thermostat to your preferred comfort temperature.
- If you have smart blinds, integrate them into the scene to close automatically when pre-cooling begins, reducing the load on the AC.
- Test and adjust the radius and pre-cooling duration based on the thermal mass of your specific room and typical seasonal conditions.
This level of automation not only enhances comfort but provides a direct and measurable reduction in energy consumption by eliminating unnecessary cooling or heating of an unoccupied space. It is a critical software layer on top of a well-designed hardware system.
How to Lower Your HVAC Load by 25% With Strategic Thermal Blinds?
The most effective way to cool a glass extension is to prevent the sun’s energy from entering it in the first place. This is a far more efficient strategy than allowing the room to heat up and then using mechanical energy to pump that heat back out. Strategic window treatments are not merely decorative; they are a primary component of the HVAC system. A 25% reduction in cooling load is a conservative estimate for a well-designed shading system.
The key metric is the Solar Heat Gain Coefficient (SHGC), a value between 0 and 1 that represents the fraction of solar radiation admitted through a window. A lower SHGC means less solar heat is transmitted. While modern glazing has improved SHGC, even the best glass can be overwhelmed by direct sun. For instance, research from Singapore’s NTU shows that advanced solar control coatings can achieve impressive performance, but dynamic shading offers a more adaptable solution.
Different types of blinds offer varying levels of performance. Cellular or “honeycomb” blinds are particularly effective because their structure traps a layer of air, providing an additional insulating barrier (R-value) on top of their shading properties. Exterior solar screens are even more effective at blocking heat as they stop the energy before it even touches the glass surface. The choice depends on the climate, orientation of the extension, and aesthetic goals.

The performance of these systems is quantifiable. The following table compares common thermal blind types and their impact on reducing solar heat gain and adding insulation. Integrating this data into the initial load calculation is essential for right-sizing the HVAC unit.
| Blind Type | SHGC Reduction | R-Value Added | Best Season |
|---|---|---|---|
| Dual-cell Honeycomb | 45% | 3.5-4.0 | Winter |
| Roman w/ Thermal Liner | 35% | 2.5-3.0 | Year-round |
| Exterior Solar Screens | 65% | 1.0-1.5 | Summer |
| Motorized Reflective | 50% | 2.0-2.5 | Summer |
By motorizing these blinds and integrating them with a smart thermostat, they can be deployed automatically during peak sun hours or when the room is unoccupied, creating a dynamic thermal shield that dramatically lowers the demand on the air conditioner.
How to Sit Next to a Large Window in Winter Without Feeling a Draft?
In winter, the comfort challenge in a glass extension shifts from managing solar gain to combating heat loss and cold drafts. Even with high-performance, triple-pane windows, the large surface area of cold glass creates a phenomenon known as radiant heat loss. Your body radiates heat towards the cold glass surface, making you feel chilled even if the room’s air temperature is technically warm. This is often perceived as a “draft.” Simply blasting more hot air into the room is an inefficient solution that often creates dry, stuffy conditions.
A more effective engineering approach is to tackle the problem at its source with radiant heating and by improving the thermal mass of the surrounding structure. Radiant floor heating is an ideal solution for a glass room. By heating the floor slab itself, it turns the entire floor into a large, gentle radiator. The warmth rises evenly, heating objects and people in the room directly, rather than just the air. This directly counteracts the feeling of radiant heat loss to the cold glass, creating a much more profound sense of comfort at a lower air temperature.
Another often-overlooked strategy is to increase the thermal mass of the non-glazed parts of the structure, particularly the ceiling. A standard drywall ceiling has very little ability to store heat. Upgrading to a more substantial, well-insulated ceiling assembly can make a significant difference.
The material used to make the ceiling should be thick with many air pockets. During the day, when there’s sunshine, the thick ceiling board will absorb heat. At night, when the temperature drops, the warm ceiling will insulate the room.
– Home Insulation Specialists, No Ordinary Homestead Guide
This absorbed heat is slowly released back into the room during the evening, helping to buffer temperature drops and reduce the load on the mechanical heating system. This passive solar strategy works in tandem with an active heating system to create a stable and comfortable environment.
Ultimately, winter comfort in a glass room is achieved not by overpowering the cold, but by creating warm surfaces that balance the radiant heat exchange and stabilize the indoor environment. It’s a more sophisticated and far more comfortable approach than simply increasing airflow.
Key takeaways
- The primary goal is load reduction, not increased HVAC capacity. Invest in better glass, frames, and shading first.
- Right-sizing is critical. An oversized AC unit will fail to dehumidify, creating a cold, clammy, and damaging environment.
- Treat shading as a mechanical system. Dynamic, automated blinds can cut cooling loads by over 25% by blocking heat before it enters.
How to Justify the Cost of a Motorized Pergola Compared to a Fixed Roof?
At first glance, a motorized louvered pergola may seem like a luxury upgrade over a fixed, solid roof for an extension. From an HVAC engineering perspective, however, it is an active, dynamic component of the climate control system, and its higher initial cost can often be justified through a return-on-investment (ROI) analysis based on energy savings and increased usability.
A fixed solid roof provides constant shade. This is beneficial in peak summer but a significant disadvantage in winter, when passive solar gain is desirable to help heat the space. A motorized pergola offers the best of both worlds. In summer, the louvers can be closed or angled to provide complete shade, drastically reducing the solar heat gain and thus the cooling load on the AC unit. As glazing performance data indicates that up to 67% of solar heat can be blocked by effective shading, the impact is substantial. This reduction in load can allow for the installation of a smaller, less expensive, and more efficient HVAC unit.
Conversely, in winter, the louvers can be opened fully to allow maximum sunlight to penetrate the extension’s glazing, providing free passive solar heating and reducing the demand on the furnace or heat pump. This year-round adaptability is the core of its financial justification. The ROI calculation involves several factors:
- Reduced HVAC Tonnage: Calculate the cooling load with a fixed roof versus a dynamic pergola. The ability to block sun can reduce the required AC tonnage by 0.5 to 1 ton, a significant upfront saving.
- Energy Savings: Estimate the reduced runtime of the AC in summer and the reduced runtime of the heater in winter. Multiply these kilowatt-hour savings by your local electricity rate over the lifespan of the system.
- Increased Usability: While harder to quantify, the ability to use the space comfortably for more days of the year adds significant value to the home.
By viewing the pergola as a functional part of the home’s mechanical system rather than just a roof, its value proposition becomes clear. It is a strategic investment that reduces both initial capital expenditure on HVAC equipment and long-term operational energy costs.