Contrary to popular belief, a finish’s cleanability isn’t determined by its sheen, but by its underlying quality and technology.
- A high-quality, washable matte finish can be far easier to maintain than a low-quality, scratch-prone gloss finish.
- Key failure points like peeling and yellowing are linked to specific material choices (e.g., adhesive type, lacquer base), not the level of gloss.
Recommendation: Instead of asking “gloss or matte?”, ask your supplier about their edge banding adhesive, lacquer composition, and curing process to gauge true durability.
Choosing the right finish for your kitchen cabinets feels like a high-stakes decision. You’re balancing aesthetics, budget, and the promise of a kitchen that looks pristine for years to come. The central debate often boils down to a simple-sounding question: high-gloss or matte? The common advice is a confusing paradox. We’re told high-gloss is a breeze to wipe down but acts as a magnet for every fingerprint and micro-scratch. Matte, on the other hand, supposedly hides minor imperfections but can absorb oils and stains, making it impossible to truly clean.
This leaves renovators caught between two seemingly flawed options. But what if this entire debate is focused on the wrong attribute? The truth is, the gloss level of a finish is one of the least important factors in its long-term maintenance. The real determinant of a cabinet’s durability and cleanability lies in its finish integrity—a concept that encompasses the quality of the lacquer, the technology of the surface, the precision of the application, and the durability of its construction. A premium washable matte can outperform a cheap gloss, and a well-applied gloss can be more resilient than you think.
This guide will move beyond the superficial “gloss vs. matte” argument. We will explore the technical factors that truly dictate how easy your cabinets will be to live with. By understanding the science behind light reflection, scratch repair, moisture resistance, and material degradation, you’ll be equipped to select a finish based on its quality, not just its sheen.
To help you navigate these critical details, this article breaks down the key performance indicators of a quality cabinet finish. We will cover everything from optical properties to the crucial, yet often overlooked, aspects of installation and long-term care.
Summary: High-Gloss vs Matte Lacquer: Which Facade Finish Is Easier to Keep Clean?
- Why High-Gloss Facades Make Small Kitchens Feel Brighter and Larger?
- How to Polish Micro-Scratches out of Lacquer Like a Pro?
- Spray Lacquer vs Foil Wrap: Which Resists Peeling in Humid Bathrooms?
- The Yellowing Effect of Direct Sunlight on White Lacquer
- When Can You Scrub Your New Cabinets: The 30-Day Cure Rule?
- Washable Matte vs Standard Matte: Is the Extra Cost Justified for Kitchens?
- The Edge Banding Sign That Indicates Your Cabinet Doors Will Peel in 2 Years
- When to Install Joinery: Before or After Final Floor Finishing?
Why High-Gloss Facades Make Small Kitchens Feel Brighter and Larger?
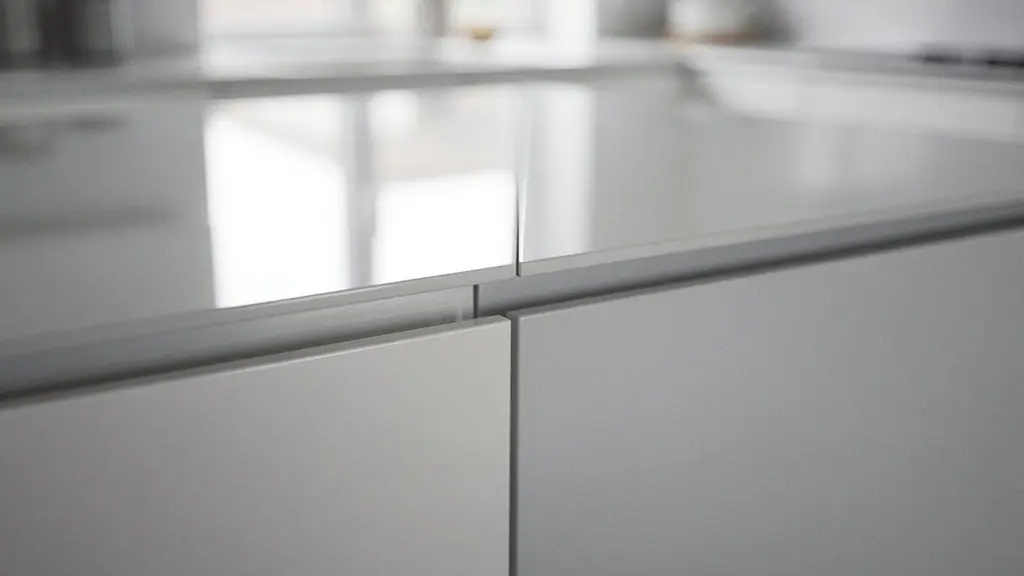
The ability of high-gloss cabinets to transform a small, dim kitchen into a brighter, more expansive-feeling space is not just a matter of opinion; it’s based on the physics of light. The magic lies in a phenomenon known as specular reflection. A high-gloss surface is incredibly smooth at a microscopic level, causing it to act like a mirror. When light rays from windows or fixtures hit the surface, they bounce off at a predictable, uniform angle, preserving the brightness and clarity of the light source.
In contrast, a matte finish creates diffuse reflection. Its surface is microscopically uneven, so it scatters light rays in countless different directions. This softens the light and eliminates glare, but it also reduces the total amount of light reflected back into the room. Research on cabinet finishes shows that high-gloss surfaces can be incredibly effective at this, with some high-gloss cabinets reflecting up to 90% of available light. This powerful light-bouncing effect creates the illusion of depth and space, making it a powerful tool for kitchen designers working with compact layouts.
To understand this difference, consider the visual texture. The image below provides a clear comparison of how these two surface types interact with light.

As you can see, the glossy surface produces sharp, defined reflections, effectively doubling the impact of your kitchen’s lighting. The matte surface, while elegant, absorbs more light and provides a softer, more subdued effect. For anyone looking to maximize brightness and create a sense of openness, the superior reflective properties of a high-gloss finish are a significant functional advantage.
How to Polish Micro-Scratches out of Lacquer Like a Pro?
While high-gloss finishes are celebrated for their sleek look, they are also notorious for showing fine surface imperfections, often called “micro-scratches” or “swirls.” These are typically caused by improper cleaning with abrasive cloths or harsh chemicals. The good news is that for most minor surface abrasions, a professional-looking repair is achievable at home without needing a full refinish. The key is to use the right materials and technique, treating the lacquer like the clear coat on a high-end automobile.
The first step is diagnosis. Gently run your fingernail across the scratch. If your nail catches, the scratch is too deep for a simple polish and may require professional attention. However, if the surface feels smooth, it’s likely a micro-scratch in the top layer of the lacquer that can be polished out. It is crucial to remember that this process is only for high-gloss finishes. Attempting to polish a matte surface will burnish it, creating a permanent shiny spot and ruining the finish.
Action Plan: Professional Micro-Scratch Removal
- Assess Depth: Run a fingernail over the scratch. If it catches, the damage is too deep for polishing and needs professional refinishing.
- Clean Thoroughly: Wash the entire surface with a mild, pH-neutral detergent and water. Dry it completely with a clean, soft microfiber towel.
- Apply Compound: Using a foam applicator pad, apply a small amount of a fine-cut automotive swirl remover. Work it into the scratched area with gentle, overlapping circular motions.
- Wipe Residue: Immediately wipe away all compound residue with a separate, high-quality microfiber towel to prevent new scratches from forming.
- Protect the Finish: Apply a sacrificial coat of high-quality carnauba wax or a synthetic paint sealant. This adds a protective barrier and enhances the gloss.
For more significant damage, the approach must be more aggressive, often escalating to professional intervention. For anything beyond minor swirls, expert refinishing services are recommended to ensure a flawless result without damaging the cabinet further. Professionals have access to multi-stage sanding equipment and spray tools to perfectly blend the repair.
Spray Lacquer vs Foil Wrap: Which Resists Peeling in Humid Bathrooms?
When it comes to high-moisture environments like bathrooms or even kitchens near a dishwasher, the durability of a cabinet finish is put to the ultimate test. Here, the debate is less about gloss versus matte and more about the fundamental construction of the door: a monolithic spray lacquer coating versus a laminated foil wrap (thermofoil). In this battle against humidity, spray lacquer is the undisputed champion.
A professionally applied spray lacquer finish creates a continuous, seamless coating over the entire surface of the cabinet door, including the edges. This monolithic shell leaves no seams, gaps, or weak points where moisture can penetrate. When applied over a moisture-resistant substrate like MR-MDF, a quality lacquer finish is exceptionally resilient. In fact, furniture industry data indicates that quality lacquer finishes can last 8-10 years without failure, even in humid conditions.
Thermofoil, on the other hand, is a PVC vinyl film that is heat-pressed and vacuum-sealed onto an MDF core. While the face of the door is sealed, the Achilles’ heel is the edge and back. Over time, heat and steam can cause the adhesive to fail, allowing the foil to delaminate, peel, or bubble, especially at the corners and seams. Once this peeling begins, the underlying MDF is exposed to moisture, leading to swelling and irreversible damage. Repair is not an option; the entire door or drawer front must be replaced.
The following table clearly outlines why spray lacquer is the superior choice for any area prone to moisture.
| Feature | Spray Lacquer | Foil/Thermofoil Wrap |
|---|---|---|
| Moisture Entry Points | None (monolithic coating) | Edges, corners, seams |
| Required Substrate | MR-MDF essential | Any MDF/particleboard |
| Humidity Resistance | Excellent when properly applied | Poor at edges over time |
| Repair Options | Can be refinished | Full replacement needed |
| Lifespan in Bathrooms | 8-10 years | 3-5 years |
The Yellowing Effect of Direct Sunlight on White Lacquer
A pristine white kitchen is a timeless goal, but the fear of it turning a dingy yellow over time is a major concern for renovators. This yellowing is a direct result of photodegradation, a chemical reaction caused by exposure to ultraviolet (UV) radiation from direct sunlight. However, not all lacquers are created equal in this regard, and modern chemistry offers excellent solutions to prevent this unwanted aging effect.
The primary culprit behind yellowing in older or lower-quality finishes is nitrocellulose lacquer. While it’s fast-drying and easy to apply, it has a natural tendency to amber with age and UV exposure. To combat this, the finishing industry has largely moved towards superior formulations. According to experts, the best defense is choosing the right type of lacquer from the start. As noted in a guide for woodworkers, acrylic lacquers are preferred over nitrocellulose because they are inherently non-yellowing and maintain their brilliance over time.
Modern lacquers, particularly two-part acrylic or polyurethane formulas, often include built-in UV inhibitors that act like sunscreen for your cabinets, absorbing or reflecting harmful radiation before it can alter the color. For kitchens with significant sun exposure, combining a UV-resistant lacquer with secondary measures provides the ultimate protection. Applying a high-quality UV-blocking film to windows is an effective strategy; these clear films can block up to 99% of UV rays without noticeably reducing visible light.
When ordering custom cabinets, you can take control of this factor. Be specific with your cabinet maker: request a non-yellowing, post-catalyzed acrylic or polyurethane lacquer. This proactive choice in material science is far more effective than any cleaning method after the fact and ensures your white kitchen stays bright and true for years.
When Can You Scrub Your New Cabinets: The 30-Day Cure Rule?
One of the most common and damaging mistakes new cabinet owners make is cleaning their lacquered surfaces too aggressively, too soon. While a new lacquer finish may feel dry to the touch within hours, it is not yet fully hardened. The finish undergoes a longer process of chemical curing, where solvents continue to evaporate and the lacquer molecules cross-link to form a hard, durable shell. This process is critical for the finish’s long-term resistance to scratches, chemicals, and stains.
As a rule of thumb, you must respect the 30-day cure rule. During this initial “curing window,” the finish is still relatively soft and vulnerable to imprinting, scratching, and chemical damage. According to industry professionals, while lacquer is touch-dry quickly, the full chemical curing of lacquer finishes requires a minimum of 30 days. Any aggressive cleaning during this period can permanently harm the finish.
To avoid issues, follow a staged care approach during this critical first month:
- Stage 1 (Days 1-7): Hands Off. For the first week, avoid touching the surfaces as much as possible. If you must remove dust, use only a feather duster. Do not use any cleaning products or cloths.
- Stage 2 (Days 8-30): Water Only. During this period, you can gently wipe up spills or smudges immediately using a soft, damp cloth with water only. Do not use any soap, detergents, or all-purpose cleaners. Do not scrub.
- Stage 3 (Day 30+): Fully Cured. After 30 days, the finish has reached its maximum hardness. It is now safe to clean with a mild, pH-neutral cleaner recommended by the manufacturer, applied with a soft microfiber cloth.
Patience during this curing window is a small investment that pays huge dividends in the longevity and beauty of your cabinetry. Rushing to scrub or using harsh chemicals too early can lead to damage that is difficult or impossible to reverse.
Washable Matte vs Standard Matte: Is the Extra Cost Justified for Kitchens?
The biggest complaint against standard matte finishes, especially in a high-traffic kitchen, is their poor resistance to fingerprints and grease. A standard matte surface is microscopically porous, which means oils from hands or cooking splatters can absorb into the finish, leaving marks that are difficult or impossible to remove. This is where modern “washable matte” technology changes the game entirely, justifying its premium price point.
Washable matte, also known as anti-fingerprint matte, is not just a standard finish with a fancy name. It is an advanced surface technology that incorporates nano-level additives and a different chemical structure (cross-linking) to create a non-porous, highly durable surface. This technology prevents oils from penetrating the finish, allowing them to sit on the surface where they can be easily wiped away with a simple damp cloth without leaving a smear or “burnishing” the finish.
As one industry report puts it, the difference is night and day. The following sentiment captures the core value proposition:
The oily fingerprint and grease splatter test is the primary value proposition – washable matte allows oils to be wiped away without a trace
– Industry Testing Standard, Cabinet Surface Technology Report
While a washable matte finish can cost 20-40% more than a standard matte, its performance benefits in a kitchen environment offer significant long-term value. The ease of cleaning saves time and frustration, and its superior longevity means the cabinets will maintain their pristine appearance for much longer. For a busy family kitchen, the extra investment is easily justified by the dramatic improvement in daily maintenance and durability.
| Feature | Standard Matte | Washable Matte |
|---|---|---|
| Oil Absorption | High – leaves permanent marks | Low – wipes clean |
| Fingerprint Resistance | Poor | Good to Excellent |
| Cleaning Ease | Difficult | Simple wipe-down |
| Technology | Basic coating | Nano-level additives, cross-linking |
| Cost Premium | Base price | 20-40% higher |
| Longevity | 5-7 years | 10+ years |
The Edge Banding Sign That Indicates Your Cabinet Doors Will Peel in 2 Years
Perhaps the most common point of failure on modern cabinet doors isn’t the face, but the edge. A peeling edge is an immediate sign of low-quality manufacturing, and it’s a problem that often reveals itself within a couple of years, especially in the heat and humidity of a kitchen. The secret to a long-lasting edge lies in the type of edge banding adhesive used during production—a detail you can often spot before you even buy.
Low-cost cabinet manufacturers often use EVA (ethylene vinyl acetate) hot-melt glue for edge banding. This adhesive is cheap and fast to apply, but it has a low melting point. When placed next to a heat source like an oven, dishwasher, or even a toaster, the glue can soften, allowing the edge band to delaminate and peel away. A tell-tale sign of cheap EVA glue is a thick, visible, often yellowish glue line between the door face and the edge band.
In contrast, high-quality manufacturers use far superior technologies like PUR (polyurethane reactive) hot-melt adhesive or laser edge banding. PUR glue forms a chemical cross-linking bond as it cures, making it extremely resistant to heat and moisture. Laser edge banding uses a laser to melt the surface of the banding itself, fusing it directly to the MDF substrate for a seamless, glue-free joint. Both methods create a bond that is waterproof, heat-resistant, and so clean that the glue line is virtually invisible. This is a key marker of “finish integrity.”
Before finalizing a cabinet purchase, perform a close inspection. Use this checklist to spot the warning signs of poor quality:
- The Glue Line Test: Look for a visible, thick glue line. A high-quality PUR or laser edge should have an almost invisible transition.
- The Fingernail Test: Run your fingernail from the cabinet face over the edge. It should feel perfectly smooth, with no catch.
- The Corner Inspection: Check the corners for any gaps, lifting, or excess glue squeeze-out. Quality corners are perfectly crisp.
- Location Check: Pay extra attention to doors and panels located near heat and steam sources, as these are the first to fail.
Key Takeaways
- True cleanability depends on the underlying surface technology and lacquer quality, not just the level of sheen. A premium matte can outperform a cheap gloss.
- Identify quality by investigating the details: ask for non-yellowing acrylic lacquers and inspect for invisible PUR or laser edge banding.
- For maximum longevity, respect the 30-day curing window for any new lacquer finish by avoiding all cleaning products and aggressive scrubbing.
When to Install Joinery: Before or After Final Floor Finishing?
The final stage of a kitchen renovation involves a critical sequencing question: do you install the finished flooring first, then place the cabinets on top, or install the cabinet carcasses first and run the flooring up to them? While both methods are used, the professional standard for achieving the best result and avoiding future problems is a hybrid installation method. This approach combines the best of both worlds, protecting your materials and simplifying future updates.
Installing cabinets on top of a finished floor (especially a floating floor like laminate or LVT) can cause issues. The weight of the cabinets can pin the floor down, preventing it from expanding and contracting naturally, which can lead to buckling. It also means you are paying for expensive flooring material that will be permanently hidden. Conversely, installing the flooring after the cabinets can lead to untidy cuts around the cabinet feet and make it very difficult to replace appliances like a dishwasher, which can become trapped by the new floor height.
The professional hybrid method provides a clean, stable, and future-proof solution:
- Install Carcasses: The main cabinet boxes (carcasses) are installed first, directly onto the subfloor, and leveled perfectly.
- Run Utilities: All rough-in plumbing and electrical work is completed within the cabinet footprint.
- Install Flooring: The finished flooring is then installed, cutting it neatly around the installed cabinet bases.
- Install Toe Kicks: The toe kicks or plinths are installed last, after the flooring. They sit on top of the finished floor, neatly covering the expansion gap and creating a seamless look.
- Final Fit-Out: Finally, the delicate and expensive components—the doors, drawer fronts, and decorative end panels—are mounted. This keeps them safe from damage during the messy flooring and construction phases.
This sequence ensures your floor can move freely, you don’t waste material, and your expensive cabinet fronts are protected until the very end. It represents the kind of expert foresight that defines a high-quality renovation project from start to finish.
Now that you are equipped with the knowledge to identify true quality markers, the next logical step is to use this information as a checklist when you speak with cabinet suppliers. Ask the tough questions about their materials and processes to ensure you’re investing in a finish built to last.